Sunday, April 19, 2009

Ultimate Fish Wish List

Here is a list of my ultimate fish wish list.
Some are practical, others not so much. Some rare, some common. Some I may obtain in my current tank, others I will have to wait until my next future tank. Some I have already obtained, others I may never obtain.
Whatever it is, these are some fish that I hope to keep someday at least once in my life! And of course, this list will continuallly be updated. ;)

1. Tinker's Butterflyfish - Chaetodon Tinkerii


2. Multibarred Angelfish - Paracentropyre Multifasciatus (or a hybrid ;D)


3. Rhomboid Fairy Wrasse - Cirrhilabrus rhomboidalis


4. Female Swallowtail Angelfish - Genicanthus melanospilos


5. Red Spotted Cardinal - Apogon Parvulus

Friday, April 17, 2009

Mollies - Poecilia sphenops


Mollies. The oh-so-common, breeds-like-aquatic-rats freshwater fish. Admit it, most people who've had a tank probably have had one at one point in their life.

So why am I writing about them?
Saltwater mollies.

To be accurate, mollies are brackish water fish. They're usually kept in purely freshwater systems, but they really do prefer some salt in their agua. Some people might argue that mollies kept in full saltwater systems is "unnatural", that "you will not find them on reef slopes interacting w/ tangs, clowns, or butterfly fish". But on that note, wouldn't keeping them in a full freshwater system be "unnatural" too? In fact, keeping fish in a glass box of water is "unnatural" too! A little research shows that there are plenty of people who keep mollies in reef tanks fine.

Merits of mollies in your saltwater system:
- good algae-eaters (take care of that hair algae for you)
- rapid proliferation = live fry food !
- no coral nipping!
- hardy non-aggressive fish, meaning you can use mollies instead of damsels to add to your tank once it cycles

According to Seahorse.com, the live fry food is
- Excellent food value: high in protein, lipids, and other essential nutrients--a complete package of vitamins and minerals.
- Available in all pet shops and aquarium stores.
- Easy to breed and maintain at home.

Any cons is either not applicable or easily remedied.
- Poor tolerance for saltwater (except for mollies adapted to brackish conditions)[Mollies do well in saltwater]
- Not acceptable to all sea horses [Not feeding seahorses]
- Slow rate of reproduction limits usefulness. [Keep multiple breeding females; a harem]

To keep a harem, you need to be able to sex them, which is very easy.
On left is a male, while on right is a female.

Note the pointy anal fin on the male, versus the rounded anal fin on the female.
You really only need one male, since he'll be more than happy to fertilize all the female himself.

Acclimation process took about 24 hours, via drip acclimation. Different sources say different acclimation time, varying from as little as 3 hours, to as much as weeks to acclimate the mollies. Some people claim to have thrown in mollies with no acclimation and no ill effects, but this seems to be gross negligence. The particular molly specimen I picked up was a female carrying eggs and fry. During acclimation, at around 1.005-1.010 SG (reached after 5+ hours), she aborted all fry and egg she had been carrying, evidently indicating her as being stressed. Few fry made it out alive, and even fewer stayed alive for the duration of the acclimation. However, after the complete acclimation, she herself looked quite healthy. No sign of weakness, bodily defect or effects.

Evidently, a 24 hour acclimation is quite stressful for the molly, but endurable. For any future females or weaker looking specimen, a longer acclimation period may be recommended.

Other literature:
1. Animal-World

Apogon Parvulus


Apogon Parvulus. Also called the red spotted cardinal. Beautiful fish that schools very well and looks like they could glow ever so slightly in the dark (they don't), but tragically has a incredibly high rate of death in captivity.

Thanks to a mysterious Santa, I was able to obtain 12 specimen. Sadly, like the literature goes, it's been only two weeks since their obtainment, and I'm already down to a third of the original count.
As of now, 5 is left of the original 12, though I had only received 9 of the 12 (Santa was holding them for me for a week and lost a few).

The Parvulus was kept in low flow initially, and it was during this time that I lost 4 during that time. Some of the deaths could possibly be attributed to transportation stress, or lack of willingness to feed. They showed little interested in food, even though I tried feeding PE mysis, grounded spirulina flake, Formula two flakes, frozen cyclop-eeze, and Salifert pellet food. I tried soaking in garlic, and not soaking in garlic. Same effects. The ones that died, I could see their stomach become rather flat and concave and some slight color change a day or so before their death.

John Maeda, another local reefer who received 12 Parvulus specimen at the same time, was retaining 10 at this time. He has them in a much larger tank (100g) with higher flow. After some discussion with him, I dramatically increased the flow rate. Since then, all of the Parvulus look much happier and no death since. They can definitely handle the high flow and now that the food is always kept suspended and moving, they're eating with gusto. They now lunge for cyclopeeze like piranhas and I can see them pooping now (who would've thought i'd be so happy to see poop!). Feeding is done at least three time a day.

John Maeda reports that after reducing feeding to once a day for a week, he lost another, and many others show a thin stomach. He has since increased feeding to three times a day again.

Not certain how tank size factors in to Parvulus success, but flow rate and frequency of feed is definitely important componenets. More updates to come at end of the month.

Monday, April 13, 2009

Design 10: start

The goal of this nano test tank is to combine good design with affordability.
Many people who keep nano reef tanks are limited by either (A) space, (B) money, or (C) both. This tank will attempt to meet both limitations by keeping a small footprint with a limited budget, without sacrificing looks. (Death to Aquapods! Death to Nano Cubes! Foo to Elos Minis.)


17.5" x 11.5" x 12" (~10 gallons)
Tank is a curved rim Chinese-manufactured tank, available at many LFS. The 10 gallon size was $19.99 at closest LFS.


Stand was self built, but can be easily replicated by anyone willing to try. If you don't have a miter saw, you can ask the people at Home Depot (or where ever you buy your wood) to cut to specs. After that, all you really need is:
  • clamps
  • wood glue
  • 12V+ drill
  • wood screw
  • sandpaper?

For full details on construction, I will post a separate article at a later time.

Planned Ideal Equipment:
  • Ecotech Vortech MP10
  • Rena Filstar XP2 Canister Filter, with Lily Pipes and inline heater
  • 70W Metal Halide light fixture (FishNeedIt?) with XM 20,000K

See spreadsheet for full cost and equipment details.


Rocks drilled and tied together with fishing line.


Initial dry aquascape.

Cycled started: 04/10/2009
Added vodka and Prodibio BioDigest, along with some established LR to help speed up cycle.
Temperature raised to 80 to speed up bacteria activity.

For next updates, expect...
1. Painted stand!
2. Canister filter + lily pipe set up!
3. Cycled rocks!

Saturday, April 11, 2009

Fish Quarantine Procedure

Author: Frank M. Greco
Title: How to Quarantine Your Fresh and Salt Water Fish, and Invertebrates

Reposted for information purpose. (external link)


In fact, all you'll need is listed here:
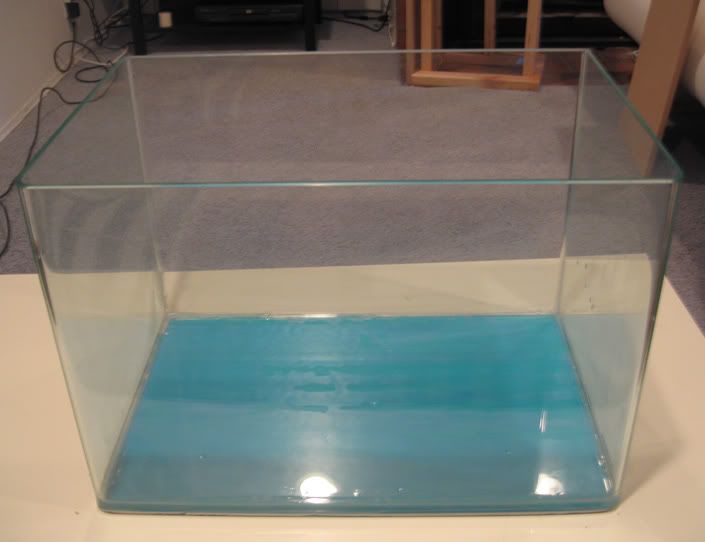
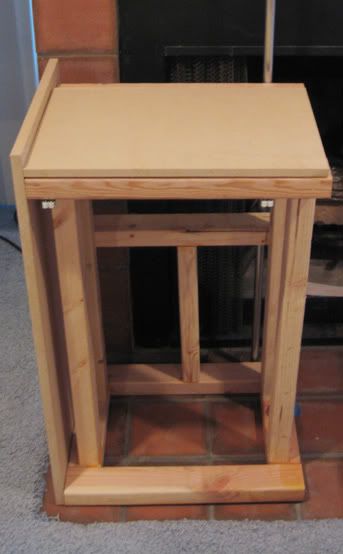
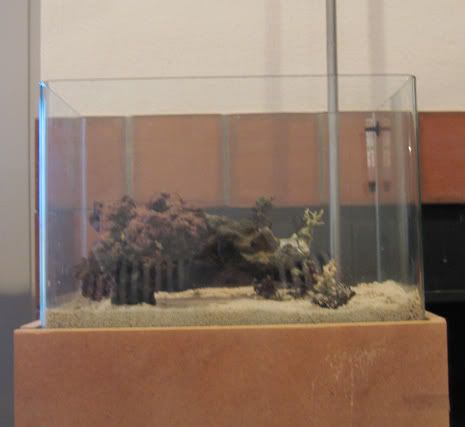
-10 gallon tank (or larger if need be)
- cover, preferably with light
- 2 or 3 pieces of 6" long 2" PVC for hiding places
- air pump
- heater and thermometer
- biologically active sponge filter
- net
- crushed oyster shell or calcareous gravel
- ammonia test kit (fresh and salt water)
- AmQuel or similar product
- nitrite test kit (freshwater)
- antibacterial medicated food
- anti-parasitic medicated food
- citrated copper (for marine fish)
- copper test kit (for marine fish)
- malachite green (for freshwater fish)


STARTING OUT
How do you start? Quite simple. You will be setting up your tank the same way you'd set up any tank, with the exception of painting the OUTSIDE bottom of the tank black or in some way blocking the bottom of the tank (note that NO substrate is used in the quarantine tank, hence the need to black out the bottom). This will give the fish the illusion of a solid bottom, and place them more at ease (with fish, as with humans, psychological well-being goes a long way to aiding with physiological well-being).

Next, place the tank on a nice sturdy, level surface (a stand made for this purpose, preferably), and fill it with 10 gallons of water from your already established aquarium. Add the heater, PVC pipe pieces, a small amount (~a handful) of crushed oyster shell or calcareous gravel in a mesh bag (buffering) and the biologically active sponge filter, and...VOILA!...a quarantine tank is born!

"Hey!", you might say, "Where do I get a biologically active sponge filter?" There are several options here. Perhaps your local dealer can sell you an active sponge filter. (A note to dealers here: since it is a good idea to have auxiliary aeration in your systems, in any event, why not utilize sponge filters? This way, when your customer needs an active sponge filter, you have plenty on hand to sell). Failing this, perhaps a fellow hobbyist can help you out. However, the easiest thing to do, in my opinion, is to always have a sponge filter on hand. This is easily accomplished by placing a working sponge filter (or two) in your sump or directly in your tank (hidden behind some decorations so that it is not visible when viewing the tank). After 4 to 6 weeks you will have an active sponge filter! After the quarantine period is over, all you need do is remove the sponge filter from the quarantine tank, rinse it under hot water, and place it back into your tank/sump for bacterial re-colonization. Really, what could be simpler?

O.K., now the tank is up and running. All environmental parameters check out (so far). What next? You'll want to add the fish, of course. Follow whatever acclimation procedures you normally follow (which, in my case, consists of netting the fish from the bag to the tank while yelling "ACCLIMATE!"). NEVER dump bag water into your quarantine or main tank. Always net the fish from the bag. Allow the fish 24 hours to settle in before starting treatment.


MARINE FISH QUARANTINE
If you have a marine system, the process is a bit more complex.

First, the acclimation of the new fish is the same, but you want to give the new arrival at least 24 hours to recuperate from bring moved before you begin medicating. If the animal does not begin to eat within 24 hours, hold off treatment until it does begin to take food.

Next, you will want to add enough citrated copper to bring the level up to 0.15 PPM (you can really go as high as 0.20 PPM, but no higher, please). I know many of you use heavily chelated (or bonded) coppers, but I advise against their use. First off, in order for copper to be truly effective, it must be in its ionic state. Heavily chelated coppers, by definition, are not in that state, and so are less than useful. The fact that, in my experience, crabs and shrimp can live in systems treated with heavily chelated copper attests to its ineffectiveness in most cases. (Try that in a system treated with an ionic copper. The inverts do not live very long). Secondly, the level produced by some chelated coppers may be far higher than is actually needed to control the disease organism (which should also tell you something. At as high a dose as some of these chelated coppers produce, the fish should be dead). This higher-than-needed dose is actually detrimental to the fish in the long run in several other ways: gill degeneration, liver shutdown, anemia, compromised immune system..the list goes on. There is absolutely NO need to subject the fish to levels far above what is needed to treat the condition.

How do you know how much citrated copper is in your system? You'll need to get a good test kit in order to measure the level. Personally I advise the powdered reagent kits over tablet or dipstick based kits, as they are far more accurate. (I have checked many a test it against atomic absorption readings, and many are consistently are off, especially when testing marine water).

In the beginning, you may find it difficult to maintain a 0.15 PPM level due to the calcareous material in the system. This is to be expected as the carbonate reacts with the copper, forming copper carbonate. At first, you will need to check the level twice a day, and add copper as needed to maintain the 0.15 PPM level. Once you get two consecutive readings of 0.15 PPM, you can consider that day one, and you can begin monitoring the level once a day, adding copper as needed.

You will want to continue this regime for 14 days. During this treatment period, you will also want to feed the fish an antibacterial medicated food. Doing so does help the fish fight off systemic bacterial problems since the copper treatment does tend to compromise the immune system to a degree. After 14 days, do a 50% water change (to bring the copper level down), and wait 24 hours after that before adding the fish to your established tank.

As with freshwater fishes, if obvious signs of any other diseases show up, treat with the correct proprietary medication for the appropriate period of time. For copper sensitive species, you can use malachite green at 0.10 PPM (which ends up being 8 drops of a 0.75% solution per 10 gallons). Treat every other day for three treatments, wait two days, and repeat. As always, monitor water quality and take appropriate action if it degrades. Please note that this treatment is NOT as effective as copper, and will not result in the same kill rate of parasites. There are other non-copper based medications that can be used (such as chloroquine phosphate, pyrimethamine,quinacrine and other proprietary medications. In my experiences with them, most are FAR less effective than is copper, and should be used only as a last resort. Also note that I have not mentioned the use of formalin as a viable treatment. There are MANY chemotherapeutic mixtures that contain formalin. However, IMO and IME, formalin should NEVER be used as part of a mixture. If one is to use it (and there is no reason why one should), it should be dosed separately, and at its correct therapeutic dose. The fact that, if dosed incorrectly, you can kill your fish quickly and that it can be injurious if gotten into ones eyes is reason enough to stay away from formalin.


NOW WHAT? AFTER QUARANTINE
O.K., your fish are through quarantine, and there are no new fish on the horizon. Now what? Simply break down the tank. Rinse everything (except the sponge filter) out with warm (NOT HOT OR BOILING) water into which a little bit of bleach has been added. (Please wear eye protection and gloves when using bleach in this manner. Also realize that bleach will eat some fabrics, and cause color loss in fabrics not intended for bleaching). The sponge filter should be rinsed in HOT water, with no exposure to bleach (some sponge material used in sponge filters reacts poorly to bleaching). Allow everything to dry, and put it away until it is needed again.

So you see, setting up and using a quarantine tank is not difficult or complicated. Remember, it is better to control a disease in a smaller tank, treating beforehand, than it is to treat in a large system. A little preventative medicine is your best bet.

SPS Quarantine Procedure

Repost for information purposes. (external link)
Sara’s Suggestions for a Full SPS Quarantine Procedure:
This process will be for treatment of AEFWs, red bugs, Sea Spiders, Monti Nudis and the many other pests that prey on our SPS corals. Also, one time dips will not kill off the eggs that are laid by many of the pests. The dips only kill living bugs, not ones in the egg stage.

There are many dip treatment methods available and they include the following:
- Iodine Dip (Overall pest dip)
- Tropic Marin Pro Coral Cure (TMPCC) - Overall pest dip
- Levamisole (pig wormer) - AEFW dip treatment
- Interceptor (dog wormer) - Red Bug dip treatment
- Fluke Tabs - AEFW dip treatment

Please note that if there are acro crabs on the corals you want to treat, you will need to remove them prior to the treatments as they will die from the dip medications.

With an incoming batch of new corals, I will first treat with a Tropic Marin Pro Coral Cure (TMPCC) dip. I overdose based on the directions on the bottle and mix a batch of saltwater in a white container and mix until a coffee brown. I let the corals sit in that for 20 minutes and blast them with a turkey baster to remove any pests that hang on during the dip. Other Iodine dips can be used instead as TMPCC can get expensive, but I have had great results with TMPCC and will continue to use it.

The next immediate treatment will be for Red Bugs. Even though the TMPCC claims to be a treatment for Red Bugs, I will still treat separate for them with Interceptor. I will do a dip in a larger container based on the quantity of SPS that came in. In the past I have used about 8 gallons of water for the treatment and going forward at least a few gallons of water will be used along with a powerhead for circulation and a heater as well. In the past I have treated for 6 hours with Interceptor for 3 treatments and have rid myself of Red Bugs. I had used about a BB size section of the large dog pill, crushed it and added it to the water. I will most likely only do 2 treatments going forward as the 3rd one was most likely overkill.

I will use the TMPCC and Interceptor for the first 2 weeks of dips. All dips will occur every 7 days and the corals will be kept in a separate QT tank for 4 weeks total before they are put in the display tank.

Starting with the 3rd dip through the 5th dip, I am going to move on to Fluke tabs for continued caution treatments for AEFWs. The recommended treatment is using 2 gallons of water and 2 crushed Fluke tabs, along with a pump to keep the water circulating for 60 minutes and a heater unless you can keep your temps stable for that 1 hour treatment. Here’s a link to the fluke tabs I will use:
http://www.drsfostersmith.com/produc...pc=1&N=0&Nty=1

For AEFWs I had treated in the past with Levamisole. Many have had some SPS not survive the treatments as Levamisole can be pretty harsh. I have had about 20% die off when using Levamisole over 4 weeks with 5 dips. Going forward I would use fluke tabs rather than Levamisole.

After the 5th treatment is done, the corals will be acclimated and added to the display tank.

Water used for the treatments will come from the QT tank. While the corals are in their treatment in a separate container, the QT tank, filter and heater will be washed in hot water with Vinegar and will be refilled with water from the display tank. The small amounts of frequent water change water for the QT will also come from the display tank.

Here are some photos of my QT tanks. The first shots show my 10 gallon tank that was used prior. I had to manually top off evaporation water at least twice a day and do frequent partial water changes throughout the week.


I have now moved to a 15 gallon tank and had a float valve drilled into the tank to that I can now do gravity feed top-off. I will still need to do water do frequent water changes to keep the parameters in check.


For lighting, I happen to have a spare 250W MH and Power Compact set-up that I use.

I cut the lighting timeframe in half as it’s hard to keep the heat down on a small tank with that much lighting (6 hours of PCs and 4 hours of MH) I had also placed my QT tank directly on the basement floor for my latest treatments and that had kept the temperature stable with a heater only. You can find some nice used lighting if you decide to QT as I do. You do not need to have MH lights as the AcroĆ¢€™s will survive without it, you just need to be sure to acclimate them to the MH lights when you add them back into the display tank is all.


Here is a batch of Acro's in a 6 hour Levamisol treatment:


Here's a photo of my most favored pests!


Here's a damaged Acro!

I hope you were able to pick up some idea's and feel free to comment!

- Credits to Sara